Tag: R&D

  • What Devs Need to Know About R&D Tax Credits

    What Devs Need to Know About R&D Tax Credits

    The research and development (R&D) tax credit was created to reward innovative companies for building and improving products and processes, including software development. Yet software companies often overlook claiming this lucrative credit. Less than one-third of eligible companies take advantage of R&D tax credits from the U.S. federal government. While the software development community may already be aware of R&D tax credits, they often lack the knowledge and resources to make the most of the system. If you’re a software developer thinking of starting your own company or building your own application or you work for a company that would benefit from the credit, here are three important pieces of the R&D puzzle you should know to optimize and defend their R&D tax credits.

    The History

    Each year, the federal government provides billions of dollars to businesses that develop and improve technologies, products and processes. Beginning in 1981 as part of the Economic Recovery Tax Act, the federal government allowed for a temporary tax credit of up to 13% on spending for qualified research on products and processes that have been developed or improved through the application of either the physical sciences, biological sciences, computer science or engineering. This can include costs associated with developing a patent, a new product or service offering or even a new technology that is sold to third parties or used internally within the business.

    In 2015, the Protecting Americans from Tax Hikes (PATH) Act permanently extended the R&D tax credit and expanded its benefits to startups and small businesses. Early-stage businesses can use the credit to eliminate up to $250K per year in federal payroll taxes.

     The Required Documentation: Meeting the Four-Part Test

    While the benefits associated with the R&D credit are significant, documentation is crucial. Historically, the cost and work involved in meeting the documentation requirements has kept many businesses from participating. Fortunately, IRS regulations outline a straightforward four-part test that creates a fairly low bar for qualification. As you read the test, you can see that the development and testing–even time spent questioning if the advancements might work–are things that should be considered.

    1. Permitted Purpose: Are you developing or improving a product, process, formula or software?

    2. Technological in Nature: Is your work within physical or biological sciences, engineering or computer sciences?

    3. Elimination of Uncertainty: Are you asking questions like, “Can we develop it?” or “How do we develop it?”

    4. Process of Experimentation: Are you systematically evaluating one or more alternatives?

    Examples might include:

    • Designing and developing new or improved technologies, algorithms, applications or databases

    • Platform design and testing

    • Compiling, programming and testing software source code

    • Newly developed techniques (architecture, algorithms, databases)

    • Software and hardware development to further communication/interaction

    • Image processing, AI and other specialty tech design

    • OS development

    • Creating mockups, UX design or technical design work

    • Testing automation to ensure quality during development

    • Establishing functional relationships between software modules for internal use or to better serve clients

    • Developing feature enhancements

    • Improving internal processes and conducting QA testing during development

    Although meeting the four-part test can be relatively straightforward, documenting it appropriately can be cumbersome. Technology can help streamline and simplify the process of claiming the credit.

    The Applicability

    External Vs. Internal

    The government has different qualifications for different types of software development: External use/third-party software (like Microsoft) versus internal use software. Internal use software has stricter requirements in addition to the four-part test above, and must meet these extra criteria to be claimed for the credits:

    1. Software must be highly innovative.

    2. Similar products must not be available commercially.

    3. Development must introduce significant economic risk.

    The R&D tax credit is available mostly on wages paid to employees who carry out the R&D work, as well as a part of the wages of contractors who carry out R&D work, as long as they are not based outside the U.S.

    Other items to note:

    • The company must own the intellectual property rights to the software being created.

    • Funded research is not considered for an R&D tax credit.

    • Qualified expenses can range from supplies to cloud computing costs and costs associated with offsite servers.

    • Both traditional IT coding and low-code platforms can be claimed under the tax credit. Low-code and no-code platforms allow businesses to build solutions without major coding investment using flexible templates that increase the experience and overall efficiency.

    If you’re a software developer thinking of starting your own company or building your own application or you work for a company that would benefit from the credit, it’s a great time to consider taking advantage of it.

  • 4 Top Tips for Developing a New Feature

    4 Top Tips for Developing a New Feature

    As a backend developer at CA BlazeMeter, I recently had the chance to work on a big feature for our web app. The feature required a massive change on our backend code, a big change on our frontend and multiple migrations. You know what I’m talking about—it was one of those projects that developers fear.

    But, I gained a lot of valuable experience from the project. Not only did we deliver a kick-ass feature, I also learned the importance of teamwork and patience when developing something new. Armed with those two values, and the right tools and technologies, you can deliver a new feature quickly and efficiently.

    Here are a few more things that I learned that should prove helpful whether you’re developing a major feature or one that only requires a minor code change.

    Tip 1: Plan to understand the development requirements

    The process of development starts way before you start coding, with planning. After the product manager decides what needs to be developed, R&D needs to understand the cost: how many days (or weeks) of development the feature will take, how many people will be needed and which APIs are required.

    To do that, the product manager needs to conduct at least three “grooming” sessions with backend, frontend and QA leaders. The grooming sessions start with the product manager presenting the product flow and requirements.

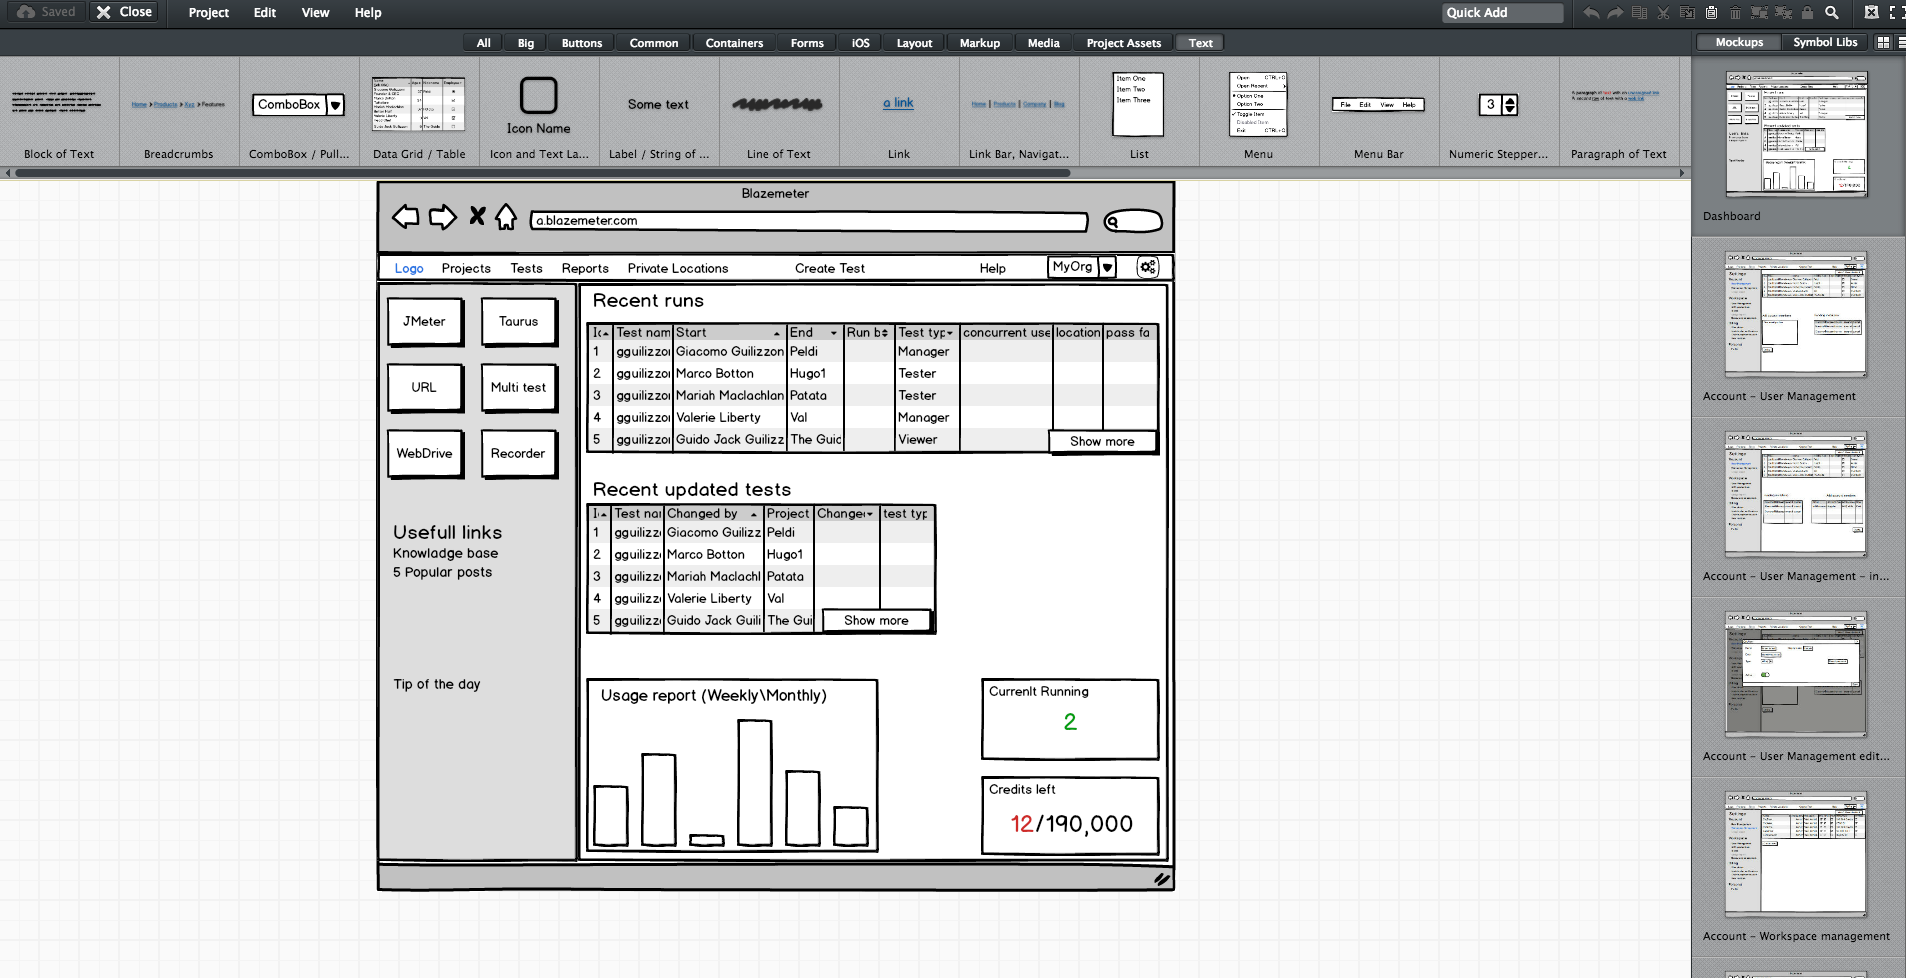
    Since no one wants to read a lot of text (except perhaps the awesome readers of this article), the product manager should prepare mockups. They don’t have to be designed or colorful, but they do need to show the team what the feature looks like in his or her vision. During our grooming sessions, we used Balsamiq, which lets you create screen sketches for how the product is supposed to look, feel and work.

    Editing screen sketches using Balsamiq

    After the initial presentation, the sessions should include a lot of open discussion—asking questions, checking for answers and examining compliance, etc. —until everyone is satisfied and understands what the feature requires from them and from others.

    This is the time and place for frontend, backend and QA to give their opinion about the schedule and to alert and flag any potential problems in development or extreme use cases. It’s the role of the product team to answer questions and change the flow and requirements until there are no R&D rejections.

    Afterward, the frontend and backend leaders need to create a feature development plan, sitting down to determine what data they need to transform the product vision into a real thing. Or in other words, which APIs are required for each flow or button, how long each step is supposed to take, including buffers, and the order of development. APIs are the agreed “contract” between the development teams. After determining the contract terms, each team can proceed individually.

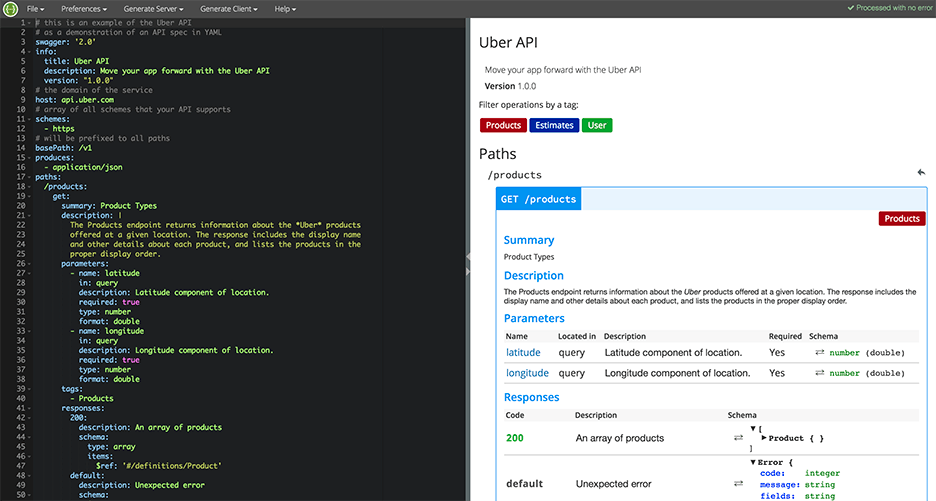
    I recommend you write your APIs in Swagger, which turns YAML files into detailed HTML pages with all the APIs.

    Swagger Editor

    This plan needs to be transparent to everyone working on the project. In fact, it’s even better if each project participant can add and describe scenarios. Tools such as TestLink and Atlassian do just that. Then, when the code is ready, developers can go over the list and see everything is covered.

    We will need to stick to this schedule later on, especially when new demands unrelated to the feature come in, such as fixing bugs. Sticking to this plan is the best way to distinguish the wheat from the chaff of the development process.

    Start writing automation ASAP

    After planning, we want everyone to start working, and not only the backend. To do that, the backend can prepare mocks, either through outsourcing services such as JSON servers, which show inputs and outputs, or by writing dummy code.

    I mentioned earlier that we used Swagger to write APIs. We also used it to generate a server in NodeJS/Python, like this:

    Generating a JSON Server through Swagger

    From this moment on, frontend can begin writing and building screens and QA can start writing API automated testing, by using tools suh as JMeter. At this point, frontend and QA have the response codes and response bodies; they know which features to put where; and which APIs they need and how to use them.

    QA also know which data they’re missing, such as field names and field data. Sure, the backend code isn’t ready yet and all of the automated exams will return “red” instead of “green,” but the main issue is making sure everyone is as prepared as possible.

    This includes load and performance testing. You can use open-source tools such as JMeter, which is enhanced by CA BlazeMeter. By uploading our test script into, configuring the number of virtual users and ramp-up time, determining geo-locations to test from and analyzing KPIs to determine trends and the health of our system, we can ensure our product is delivered to our customers without crashing.

    This is also true about sending code to QA: Developers should test their code themselves and ensure that when they commit their code, it works 99.9 percent of the time.

    By starting automation as soon as possible, you can minimize future bottlenecks in the development process.

    Ensure the team communicates and works together

    Like I said before, teamwork is the most basic requirement when creating a new feature. This is because new questions arise during development and because requirements change. Therefore, everyone in the team needs to be in sync all the time, from the product manager and the designer to the developers and QA.

    Open communication lines are crucial because everyone is working on the same product at the same time, but each developer or QA should be working on a different part of the product and on different functionalities. Communication ensures each person’s work is compatible with the rest of the team’s work. This saves time, prevents frustration and redundancy and ensures maximum professionalism.

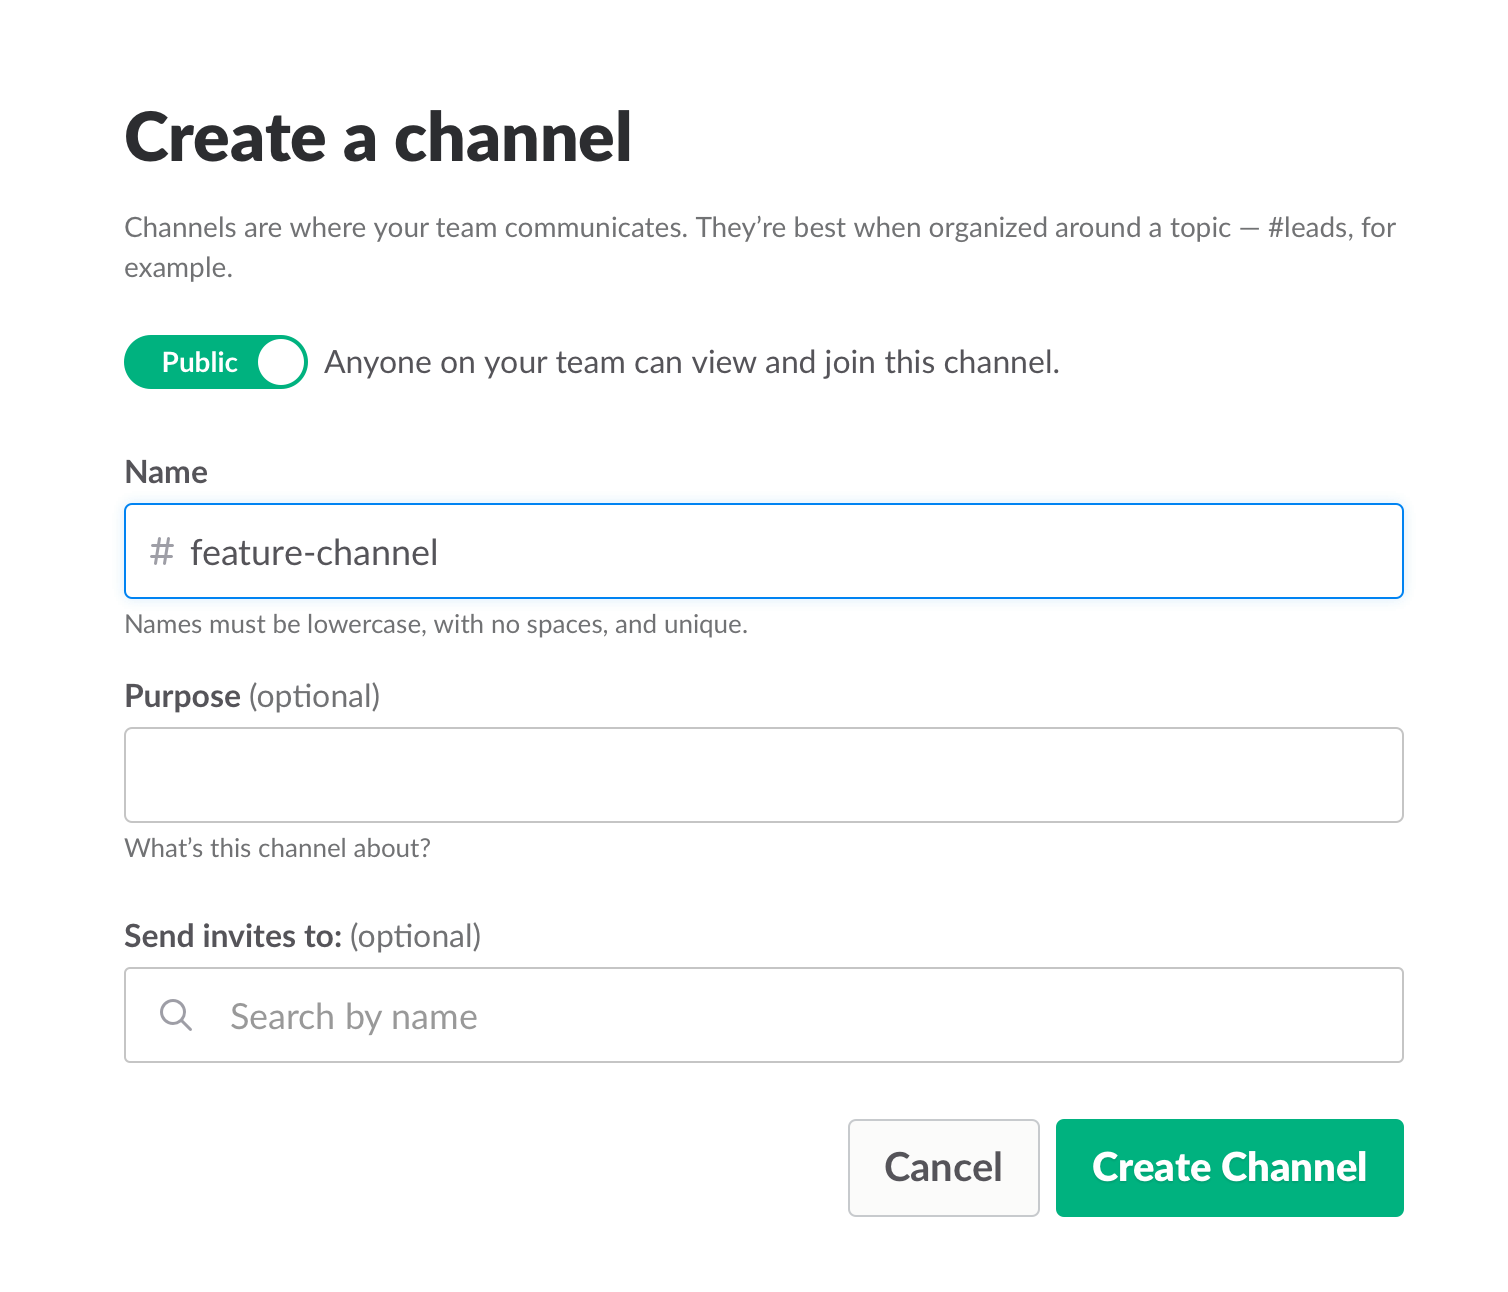
    To make sure everyone knew what was happening, we used Slack and opened a dedicated channel for the creation of this feature. We also had daily (short!) standups where we discussed what we have and what is missing.

    Opening a Slack channel

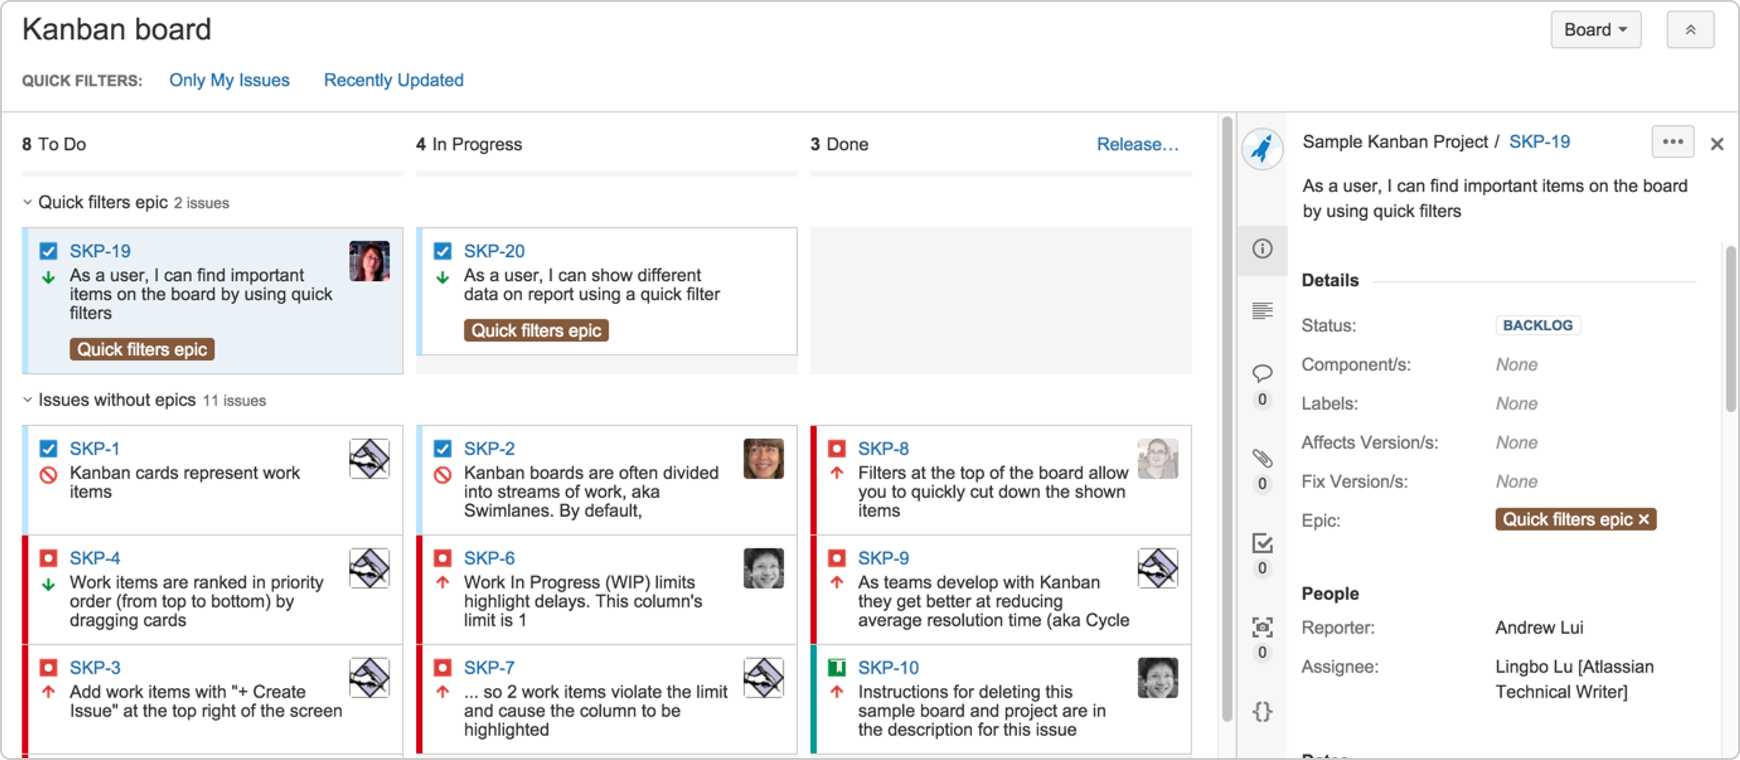
    Communication also includes team and assignment management. JIRA, our primary issue tracking tool, offers Kanban-style, Scrum and fully customizable boards, which show the progress of each development task, including the developer assigned to it, and his or her exact status or phase.

    This helps you understand what other people are working on, and just as importantly, where people are stuck. If you can, get everyone to work in an open space and put a large screen in the middle of it. This lets you stay in sync at all times.

    We used JIRA to open and manage bugs as well. This was helpful when multiple QAs found the same bug. It’s important to carefully choose which tickets are opened and put them under one epic, so everyone stays focused.


    JIRA Dashboard

    Another important aspect of communication is ensuring everyone uses the same terminology, as sometimes people might use the same term to describe different things or different terms to describe the same things. To prevent mixups that could waste your time, make sure everyone is on the same page. For example, do you say “system admin” or “<name (ex. BlazeMeter)> admin”?

    Work on the same development environments

    It’s important that everyone works on identical development environments and even on the same version of the tools and libraries. Otherwise, it could cause an (in)compatibility mess, including a lot of unnecessary back and forth and even might cause bugs to pop up. This environment needs to be as similar as possible to production, but only on a smaller scale.

    Conclusion

    Now look at the feature that came out of all that work here. I’m so grateful that I had the opportunity to work on it with an awesome team.

    I hope these best practices help you the next time you develop a new feature. Don’t forget to keep going agile after development and delivery by running tests in a continuous environment such as Jenkins for every commit.

    CA BlazeMeter works with Jenkins, ensuring you can load test in the cloud and analyze your data while shifting left. You can also use different APM tools, such as New Relic, AppDynamics and CA APM to alert you about errors before QA, which saves time.

    — Dor Atias