Author: Dor Atias

  • Safeguarding Secrets Within the Pipeline

    Safeguarding Secrets Within the Pipeline

    How can an organization write source code to use secrets without directly referencing them and risking them being leaked to the public?

    2020 closes out a decade full of countless code leaks, a topic we talk about quite often. In fact, just recently, Intel became the latest victim after 20GB worth of internal documents were leaked and uploaded to a public sharing site.

    Intel finds itself in good company as it joins a long list of 2020 victims whose confidential source code has involuntarily gone public.

    Many, if not most, of these victims share one common fatal flaw: They hard-coded secrets (logins, tokens, etc.), then published their source code to a trusted cloud computing service platform such as an online Git repository.

    It would be naive to lay blame solely on the platform, however. It has long been a reliable rule of thumb that anything you put online—gated or not—is always at some level of risk. With this in mind, one should never, under any circumstances, include secrets in their source code. Stealing source code is damaging enough; the keys to your kingdom should not be included.

    That’s easier said than done, of course. How do you write source code to use secrets without directly referencing them? In this blog, we’ll show you an overview of how you can utilize your continuous integration and delivery tools to inject secrets into your code at build/runtime without actually including them in the code itself, thus placing a veil between your code and your secrets.

    Injecting Secrets

    One method for publishing source code reliant on secrets without actually including the secrets in the code is to use placeholders within the source code which, at build time, are replaced with the actual values needed.

    Microsoft Partner Technology Strategist Primoz Kocevar details such a method in his Medium post. The general idea is that secret variables are provided to a Docker image so that no secrets are found within the source code itself.

    An environment variable, set up beforehand, stores the secret. This variable is defined in a Docker file, which is used to create an image. During the build phase, secrets are then passed via the Docker image through the variables specified in the source code. Once complete, the application and image can be deployed.

    If you happen to run your images on Kubernetes, you can also leverage its own feature for securely storing secrets. This method allows you some additional options, such as using a Kubernetes environment variable or ConfigMap within a Kubernetes pod to store secrets for injection at build time.

    By the way, this approach to secret injection is by no means exclusive to Docker or Kubernetes. Though we highlight them here as specific examples, the same method can be employed via virtually any similar solution you rely on for deploying pods or containers.

    Injecting secrets via clever use of environment variables and configuration files in your microservices platform of choice is certainly a viable option, but we don’t think it’s the best option. Consider that this approach requires one image per each secret.  This can get cumbersome fast if you have a development environment with one secret and a production environment with another secret, each requiring different images.

    Leveraging Your CI/CD Tools

    First, a quick primer for the uninitiated: Continuous integration (CI) and continuous delivery (CD) tools and practices are an essential part of the larger software supply chain. Continuous processes are those that enable developers to publish code changes easily and frequently without degrading the product’s reliability.

    Continuous integration tools and practices establish uniform processes for creating, testing and building source code, integrating with any required external systems along the way. Continuous delivery covers the activities that follow, streamlining and automating the delivery of source code to infrastructure, especially when multiple multiple environments are involved.

    Many CI/CD tools provide their own built-in solutions for securing sensitive data. You can leverage these features when storing secrets until it’s time to inject them during the build.

    For example, Jenkins provides its own credentials store and its own automatically encrypted Secret field type. (A word of caution: This alone doesn’t prevent a user from accidentally printing a secret in the console log.)

    Another CI tool, CircleCI, offers a number of options for protecting secrets, such as secret masking to prevent secrets from appearing in terminal output and contexts, which limit access to certain variables to only specific user groups.

    There are, of course, as many additional options as there are tools available.

    We can leverage such features to enhance our previous example: secrets stored in your CI/CD tool can then be injected into our Docker run command (or your platform’s equivalent command) during deployment. In other words, your CI/CD tool of choice injects secrets into the image, which in turn injects the secrets into the corresponding source code’s variables. This method ensures our secrets never appear in the actual source code.

    A word of caution: Even utilizing this approach, your secrets are still only as safe as the tool you use to secure them. The Bleeping Computer article we linked earlier in this post points out how weakly configured tools themselves pose a threat: “The leaks have been collected by Tillie Kottmann, a developer and reverse engineer, from various sources and from their own hunting for misconfigured DevOps tools that offer access to source code” (emphasis ours).

    It’s important to stress the universal rule that there is no such thing as perfect security. Consider that encrypting your secrets within one of these tools offers little protection if access to those tools is not sufficiently restrictive. We recommend cautiously limiting who is granted what level of user access to each tool, applying the least privilege principle.

    Protection Post-Deployment

    Now that we have built and deployed our secret-free code, what’s next?

    If we were to stop here, we would have overlooked the fact that any developer who has access to our containers can see our secrets. The downside to utilizing a microservice infrastructure is that there are many opportunities for security gaps to appear between all the moving parts, from the moment the first line of code is written to when it all goes live, which can easily go unnoticed.

    Containers and pods need to communicate with each other and other endpoints, thus an attacker can leverage this by compromising one container or pod then moving laterally to others, rendering any secrets stored within ripe for the taking. The bigger your distributed infrastructure, the more difficult this is to prevent, because of the inevitable complexity of security policies required to do so.

    Thankfully, many tools offer options such as built-in network/firewall policies between containers/pods and endpoints, an option to encrypt data at rest or a mechanism for enforcing the least privilege principle, such as via restricted security groups.

    Some tools may also allow you to configure a Key Management Service (KMS) provider to encrypt your secrets. A KMS provider employs an envelope encryption scheme for data stored within etcd. The added benefit to this approach is that the decryption key is stored remotely on the KMS as opposed to on the same host.

    Conclusion

    Regardless of what tools you have in play along your development pipeline, secrets must always exist outside of the source code and should be (securely) injected into the code as it passes through the pipeline.

    Wherever secrets ultimately live, be it in a remote storage location, a container or pod or within a CI/CD tool, they must always be encrypted and never stored in plaintext.

    Finally, all the obfuscation and encryption in the world will not protect secrets from a lackadaisical user access policy. The least privilege principle should always be in play and user security groups should be strictly managed to control who has access to the systems responsible for securing your secrets.

    All that said, mistakes still happen, and none of the tools discussed here perfectly ensure that no developer will nonetheless accidentally hard-code secrets into your source code. It is with that in mind that we advise adding another layer of security by automatically monitoring your source code repositories for secrets.

  • 4 Top Tips for Developing a New Feature

    4 Top Tips for Developing a New Feature

    As a backend developer at CA BlazeMeter, I recently had the chance to work on a big feature for our web app. The feature required a massive change on our backend code, a big change on our frontend and multiple migrations. You know what I’m talking about—it was one of those projects that developers fear.

    But, I gained a lot of valuable experience from the project. Not only did we deliver a kick-ass feature, I also learned the importance of teamwork and patience when developing something new. Armed with those two values, and the right tools and technologies, you can deliver a new feature quickly and efficiently.

    Here are a few more things that I learned that should prove helpful whether you’re developing a major feature or one that only requires a minor code change.

    Tip 1: Plan to understand the development requirements

    The process of development starts way before you start coding, with planning. After the product manager decides what needs to be developed, R&D needs to understand the cost: how many days (or weeks) of development the feature will take, how many people will be needed and which APIs are required.

    To do that, the product manager needs to conduct at least three “grooming” sessions with backend, frontend and QA leaders. The grooming sessions start with the product manager presenting the product flow and requirements.

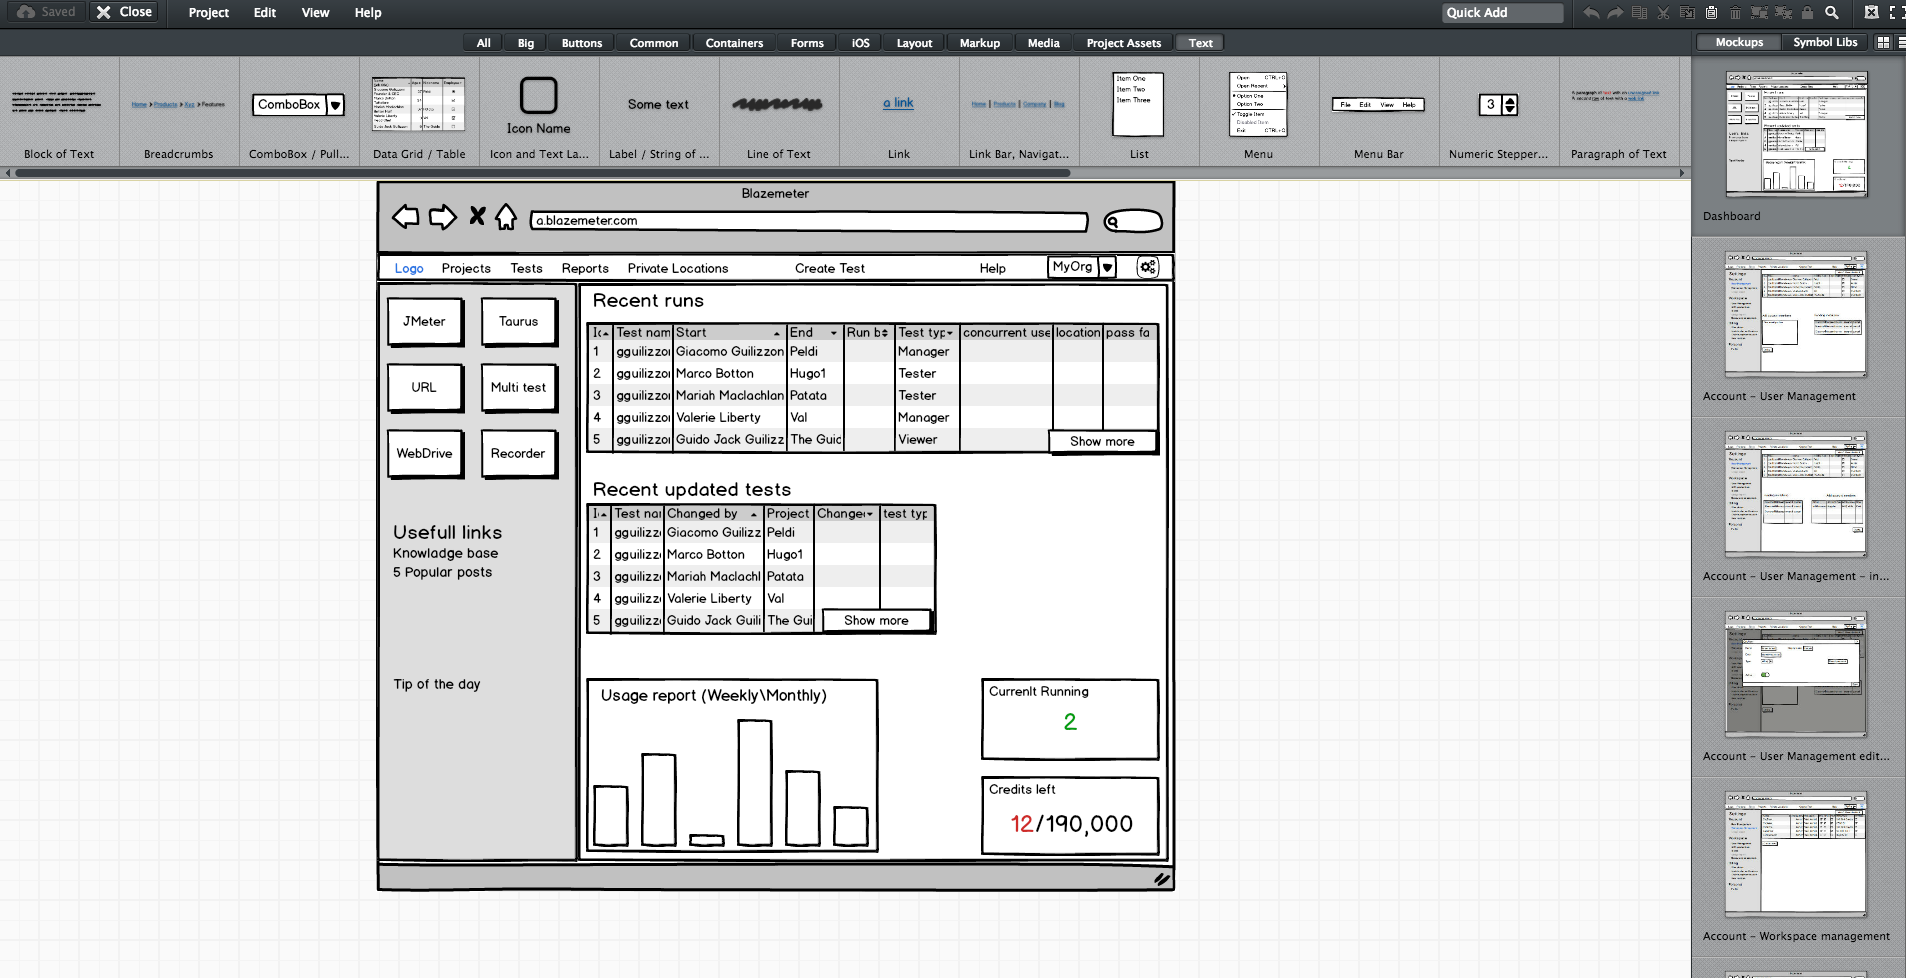
    Since no one wants to read a lot of text (except perhaps the awesome readers of this article), the product manager should prepare mockups. They don’t have to be designed or colorful, but they do need to show the team what the feature looks like in his or her vision. During our grooming sessions, we used Balsamiq, which lets you create screen sketches for how the product is supposed to look, feel and work.

    Editing screen sketches using Balsamiq

    After the initial presentation, the sessions should include a lot of open discussion—asking questions, checking for answers and examining compliance, etc. —until everyone is satisfied and understands what the feature requires from them and from others.

    This is the time and place for frontend, backend and QA to give their opinion about the schedule and to alert and flag any potential problems in development or extreme use cases. It’s the role of the product team to answer questions and change the flow and requirements until there are no R&D rejections.

    Afterward, the frontend and backend leaders need to create a feature development plan, sitting down to determine what data they need to transform the product vision into a real thing. Or in other words, which APIs are required for each flow or button, how long each step is supposed to take, including buffers, and the order of development. APIs are the agreed “contract” between the development teams. After determining the contract terms, each team can proceed individually.

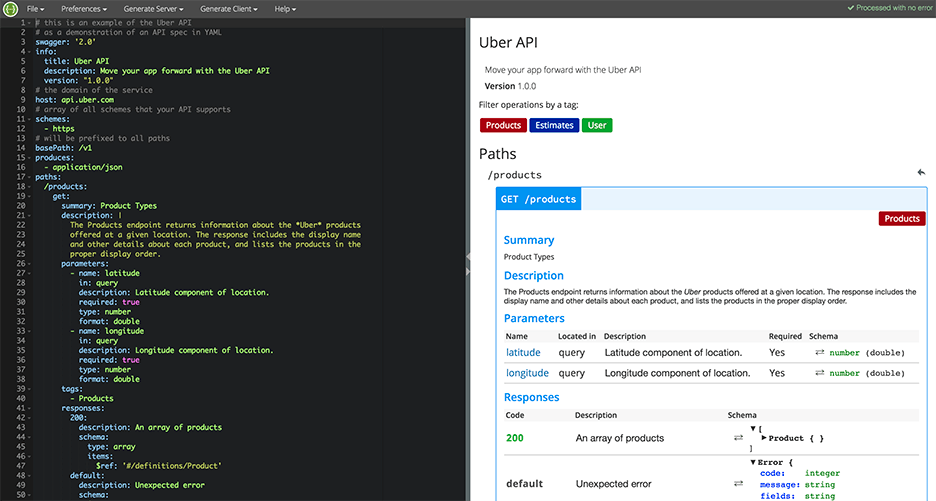
    I recommend you write your APIs in Swagger, which turns YAML files into detailed HTML pages with all the APIs.

    Swagger Editor

    This plan needs to be transparent to everyone working on the project. In fact, it’s even better if each project participant can add and describe scenarios. Tools such as TestLink and Atlassian do just that. Then, when the code is ready, developers can go over the list and see everything is covered.

    We will need to stick to this schedule later on, especially when new demands unrelated to the feature come in, such as fixing bugs. Sticking to this plan is the best way to distinguish the wheat from the chaff of the development process.

    Start writing automation ASAP

    After planning, we want everyone to start working, and not only the backend. To do that, the backend can prepare mocks, either through outsourcing services such as JSON servers, which show inputs and outputs, or by writing dummy code.

    I mentioned earlier that we used Swagger to write APIs. We also used it to generate a server in NodeJS/Python, like this:

    Generating a JSON Server through Swagger

    From this moment on, frontend can begin writing and building screens and QA can start writing API automated testing, by using tools suh as JMeter. At this point, frontend and QA have the response codes and response bodies; they know which features to put where; and which APIs they need and how to use them.

    QA also know which data they’re missing, such as field names and field data. Sure, the backend code isn’t ready yet and all of the automated exams will return “red” instead of “green,” but the main issue is making sure everyone is as prepared as possible.

    This includes load and performance testing. You can use open-source tools such as JMeter, which is enhanced by CA BlazeMeter. By uploading our test script into, configuring the number of virtual users and ramp-up time, determining geo-locations to test from and analyzing KPIs to determine trends and the health of our system, we can ensure our product is delivered to our customers without crashing.

    This is also true about sending code to QA: Developers should test their code themselves and ensure that when they commit their code, it works 99.9 percent of the time.

    By starting automation as soon as possible, you can minimize future bottlenecks in the development process.

    Ensure the team communicates and works together

    Like I said before, teamwork is the most basic requirement when creating a new feature. This is because new questions arise during development and because requirements change. Therefore, everyone in the team needs to be in sync all the time, from the product manager and the designer to the developers and QA.

    Open communication lines are crucial because everyone is working on the same product at the same time, but each developer or QA should be working on a different part of the product and on different functionalities. Communication ensures each person’s work is compatible with the rest of the team’s work. This saves time, prevents frustration and redundancy and ensures maximum professionalism.

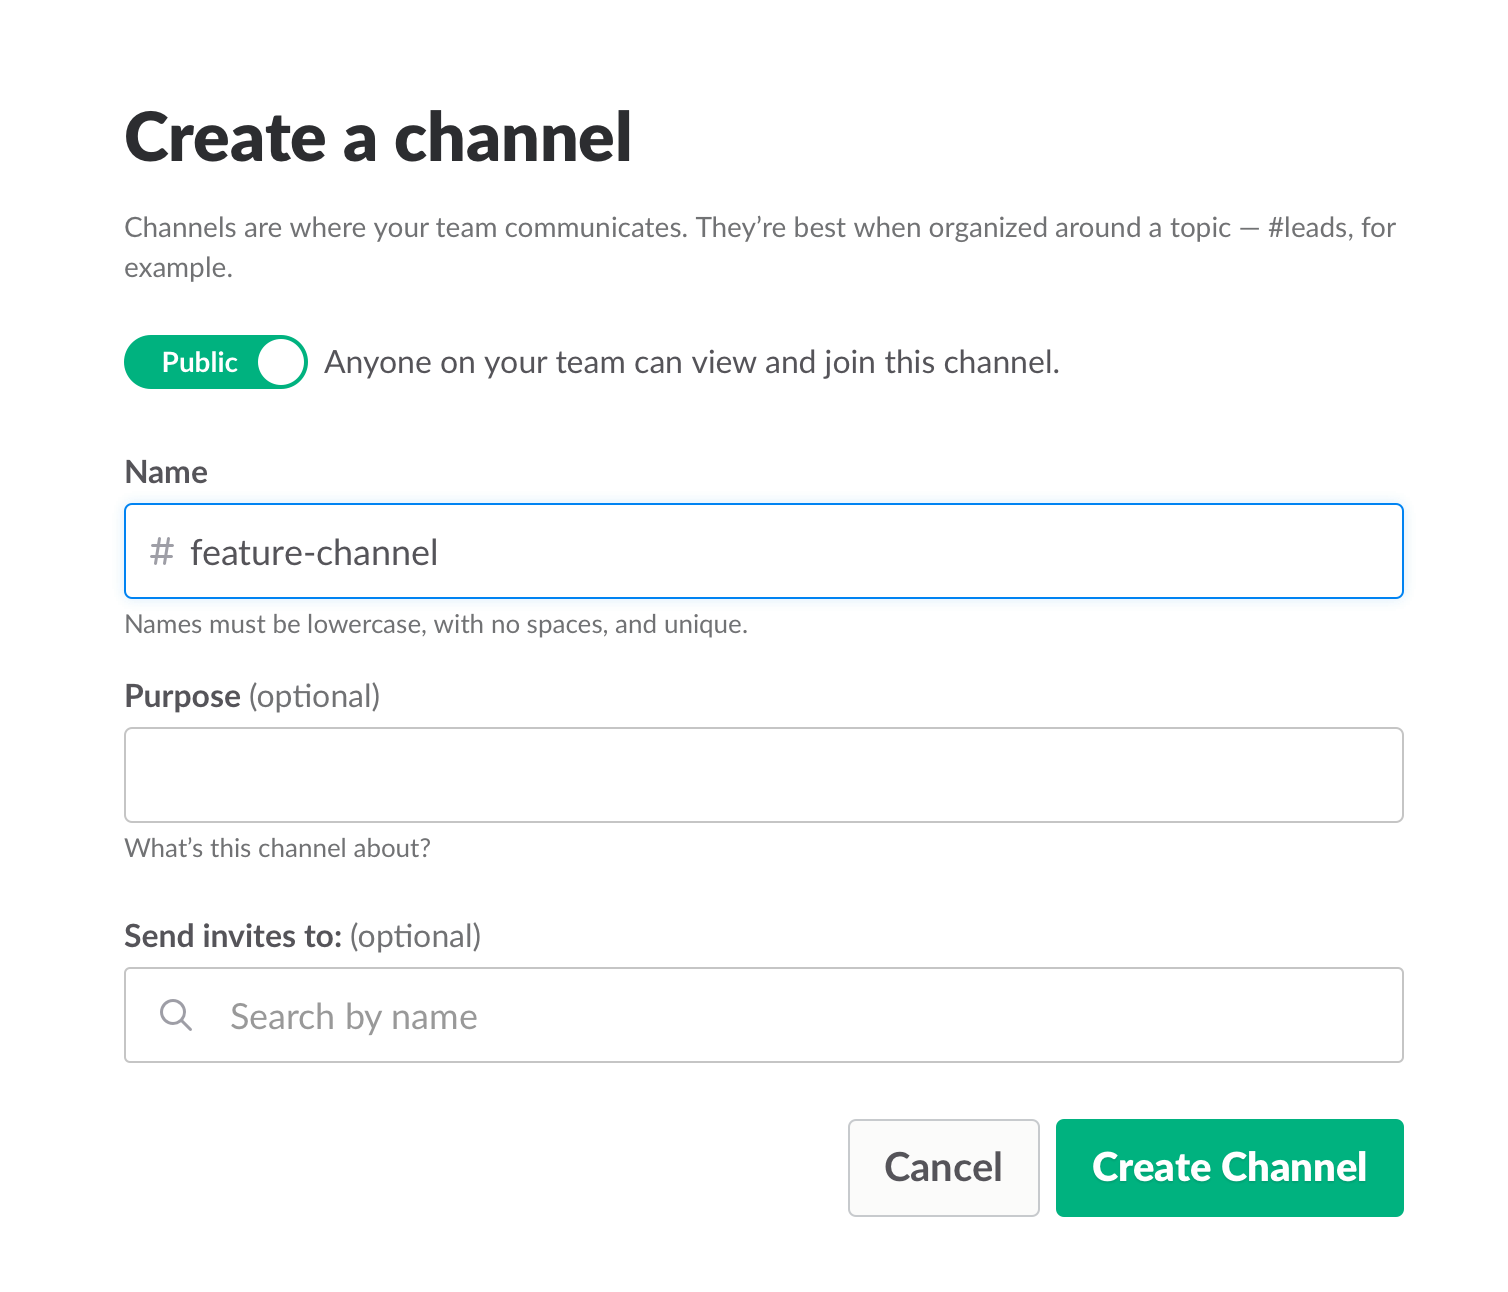
    To make sure everyone knew what was happening, we used Slack and opened a dedicated channel for the creation of this feature. We also had daily (short!) standups where we discussed what we have and what is missing.

    Opening a Slack channel

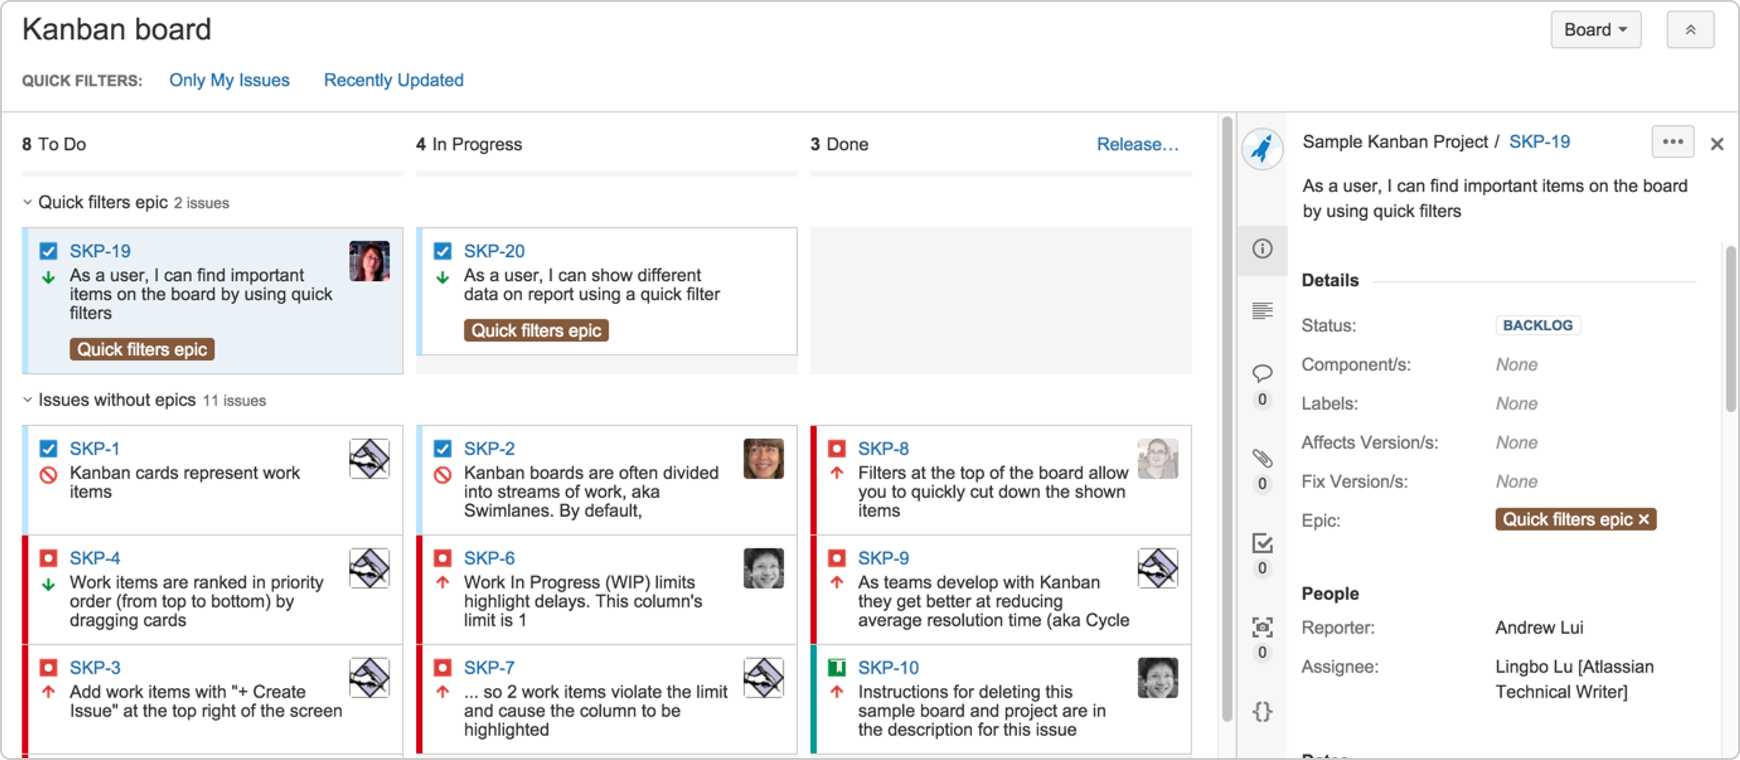
    Communication also includes team and assignment management. JIRA, our primary issue tracking tool, offers Kanban-style, Scrum and fully customizable boards, which show the progress of each development task, including the developer assigned to it, and his or her exact status or phase.

    This helps you understand what other people are working on, and just as importantly, where people are stuck. If you can, get everyone to work in an open space and put a large screen in the middle of it. This lets you stay in sync at all times.

    We used JIRA to open and manage bugs as well. This was helpful when multiple QAs found the same bug. It’s important to carefully choose which tickets are opened and put them under one epic, so everyone stays focused.


    JIRA Dashboard

    Another important aspect of communication is ensuring everyone uses the same terminology, as sometimes people might use the same term to describe different things or different terms to describe the same things. To prevent mixups that could waste your time, make sure everyone is on the same page. For example, do you say “system admin” or “<name (ex. BlazeMeter)> admin”?

    Work on the same development environments

    It’s important that everyone works on identical development environments and even on the same version of the tools and libraries. Otherwise, it could cause an (in)compatibility mess, including a lot of unnecessary back and forth and even might cause bugs to pop up. This environment needs to be as similar as possible to production, but only on a smaller scale.

    Conclusion

    Now look at the feature that came out of all that work here. I’m so grateful that I had the opportunity to work on it with an awesome team.

    I hope these best practices help you the next time you develop a new feature. Don’t forget to keep going agile after development and delivery by running tests in a continuous environment such as Jenkins for every commit.

    CA BlazeMeter works with Jenkins, ensuring you can load test in the cloud and analyze your data while shifting left. You can also use different APM tools, such as New Relic, AppDynamics and CA APM to alert you about errors before QA, which saves time.

    — Dor Atias