Category: Continuous Delivery

  • Getting Webhooks Behind that Firewall of Yours

    Getting Webhooks Behind that Firewall of Yours

    In this post I’ll show you how to receive webhooks in real time from GitHub.com, even if your CloudBees Core stuff is behind a firewall. You can generalize this to other services too – such as BitBucket or DockerHub, or anything really that emits webhooks, but the instructions will be for GitHub projects hosted on github.com. The benefit, of course, is that you can use these public hosted services if you like, but your Core instances do not necessarily have to be directly open to the internet.

    What are webhooks

    Just a very quick refresher on what webhooks are: Messages (often JSON, but not always) typically posted by HTTP(S) from a server to a client that is listening for events.
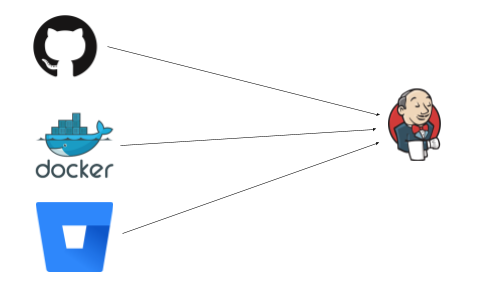
    webhooks explainer

    The events flow left to right, Jenkins sits there happily listing on paths like /github-webhook/ or /dockerhub-webhook/ etc for some HTTP request to tell it to wake up and do some work.

    GitHub/BitBucket may be reporting a new commit or PR, or DockerHub reporting an upstream image has changed. What all these things have in common is that they push to Jenkins, and expect to be able to push to it (ie that Jenkins is visible to them). This works great when the network is open – say GitHub Enterprise, or Jenkins is listening on the web.

    Not on the web

    The trick is when something gets in the middle, say a firewall:
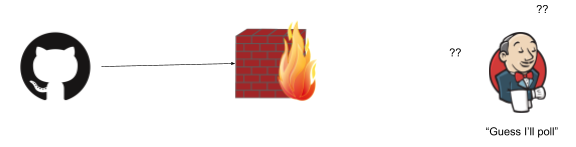
    firewall 1

    (As is industry standard, all firewalls have to be a wall on fire. Please don’t somehow set bricks on fire in your organization).

    This is just the same when you fire up Jenkins on your laptop, and want to receive webhooks from github.com (a legitimate thing, perhaps to test out your setup, perhaps to run builds for iOS on a mac, or some corner of a network that is not exposed to the web). Unless your laptop is addressable to the whole web that is (not likely), or your network is configured just right, the webhooks won’t be able to flow.

    This is fine – we can fall back to polling for changes. Except this is terrible. You burn through API quotas, and you don’t get changes in real time, and really no one is happy.

    Some problems are opportunities

    We can both solve this problem, but also, view this is an opportunity. Having things not addressable on the web, or locked down in some default way is a feature, not a bug. You massively reduce your attack surface, and can have defense in depth:
    exposed on the web

    A webhook forwarding service

    Enter the memorably named Smee. This is an OSS project provided by GitHub and also helpfully hosted as a service by GitHub. This can capture and forward webhooks for you. I’ll try to explain it with a diagram:

    firewall 2

    GitHub pushes an event (via HTTPS/json in this case) to Smee.io (the funny thing with circles, which is on the public web and accessible from GitHub.com) – and Jenkins in turn subscribes to Smee with an outgoing connection from a client. Note the direction of the arrows: Jenkins only makes an outbound connection.

    This is an important point: this will work as long as the firewall is one way (like a NAT typically is, and many networks). If the Jenkins side can’t connect to anything on the outside world – well, this won’t help with that of course (but that is not often the case).

    Setting it up

    Step 1: Firstly – go to https://smee.io/ and click “Start a new channel”:

    smeeio

    This will give you a unique URL (which you should copy for later use):
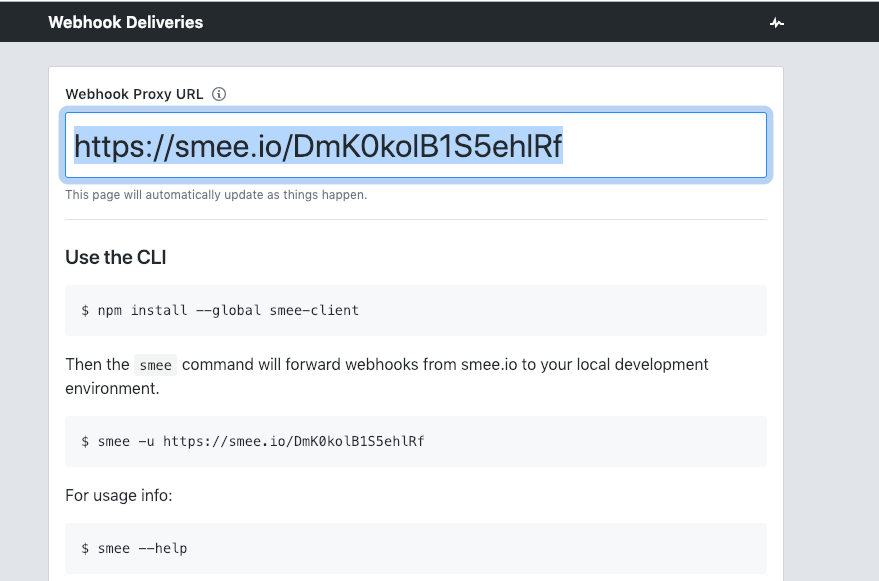
    smeeio url

    Next you should install the smee client next to where you have the Jenkins server running:

    npm install —global smee-client

    (This will make the smee client/command available to receive and forward webhooks).

    Now start the smee client and point it to your Jenkins server. In this case I have it running on port 8080 (the default if you fire it up on your laptop, change both the port and the smee URL as needed):

    smee —url https://smee.io/GSm1B40sRfBvSjYS —path /github-webhook/ —port 8080

    This says to connect to the smee service, and forward webhooks to /github-webhook/ (that trailing slash is important, don’t miss it). Once this is running, you will see it log that it is connected and forwarding webhooks. Leave this command running for as long as you want to receive webhooks.

    Next, you need to configure a pipeline that makes use of GitHub. In this case I set up one from scratch. You can skip this if you already have a pipeline setup:
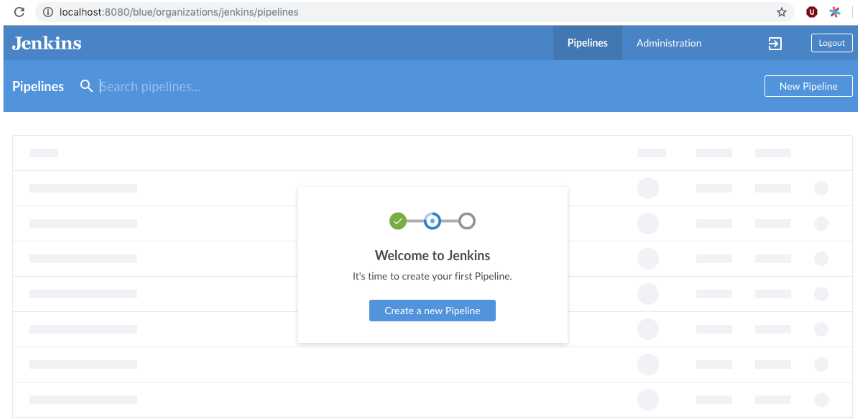
    Jenkins pipeline setup

    I then chose “GitHub” as the where the code is:

    Github code store

    Then choose your repository. This will set things up ready to receive webhooks from GitHub. (If you have an existing pipeline setup, and it is using GitHub as the SCM source, that is also fine).

    The final step is to tell GitHub to post webhook events for that repository (or organization, you can do that too) to Smee (which ultimately means Jenkins will receive them).

    Go to the settings tab for your GitHub repository, and then click “add webhook”:
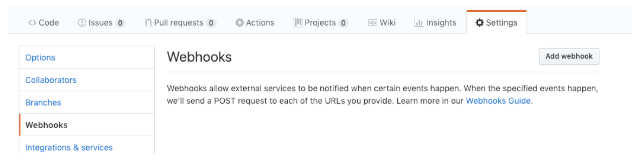
    GitHub to post webhook

    Next, configure the webhook:

    • Paste in the “smee” URL you copied from the step above.
    • Choose application/json as the content type.
    • Tell it to send everything (you can pick and choose what events, but I just did that as simpler).
    • Press Add Webhook (or update).

    It should look something like this:

    multibranch demo

    Webhooks should be flowing now. You can make a change to your repository, and check that a build starts soon after:

    app store demo webhooks

    Good luck!

    You can also get support from CloudBees for Jenkins if you need it.

    Additional resources

  • Top 10 Best Practices for Jenkins Pipeline Plugin

    Top 10 Best Practices for Jenkins Pipeline Plugin

    The Jenkins Pipeline plugin is a game changer for Jenkins users. Based on a Domain Specific Language (DSL) in Groovy, the Pipeline plugin makes pipelines scriptable and it is an incredibly powerful way to develop complex, multi-step DevOps pipelines. This document captures some definite Do’s and Don’ts of writing Jenkins Pipelines – with code examples and explanations.

    1. Do: Use the real Jenkins Pipeline

    Don’t use older plugins like Build Pipeline plugin or Buildflow plugin. Instead, use the real Jenkins Pipeline suite of plugins.

    • Why? The Pipeline plugin is a step change improvement in the underlying job itself. Unlike freestyle jobs, Pipeline is resilient to Jenkins master restarts and also has` built-in features that supersede many older plugins previously used to build multi-step, complex delivery pipelines.

    More information on getting started is available at https://jenkins.io/solutions/pipeline/.

    2. Do: Develop your pipeline as code

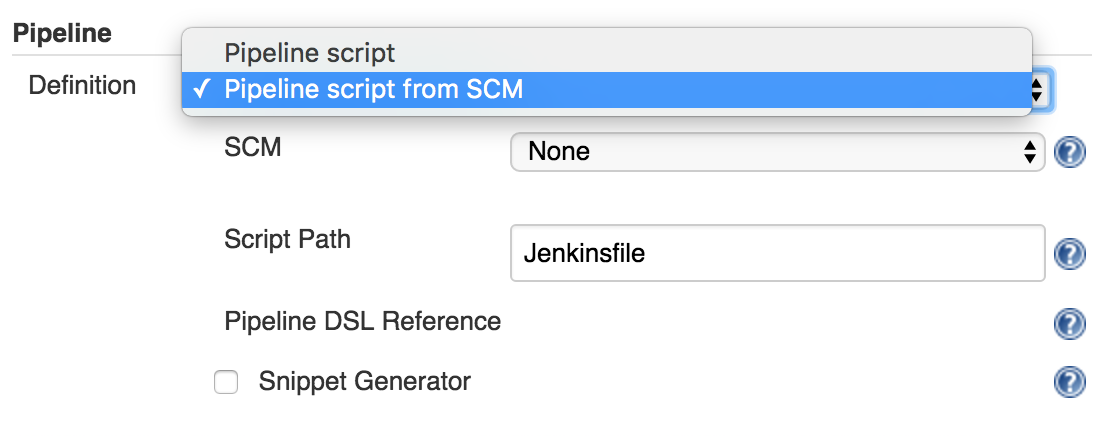
    Use the feature to store your Jenkinsfile in SCM then version and test it like you do other software.

    • Why? Treating your pipeline as code enforces good discipline and also opens up a new world of features and capabilities like multi-branch, pull request detection and organization scanning for GitHub and BitBucket.

    You should also call your Pipeline script the default name: Jenkinsfile and start the following script header, so your IDE, GitHub and other tooling recognize it as Groovy and enable code highlighting:

    #!groovy​

    ​3. Do: All work within a stage

    Any non-setup work within your pipeline should occur within a stage block.

    • Why? Stages are the logical segmentation of a pipeline. Separating work into stages allows separating your pipeline into distinct segments of work.

    Example:

    stage 'build'
    //build
    stage 'test'
    //test

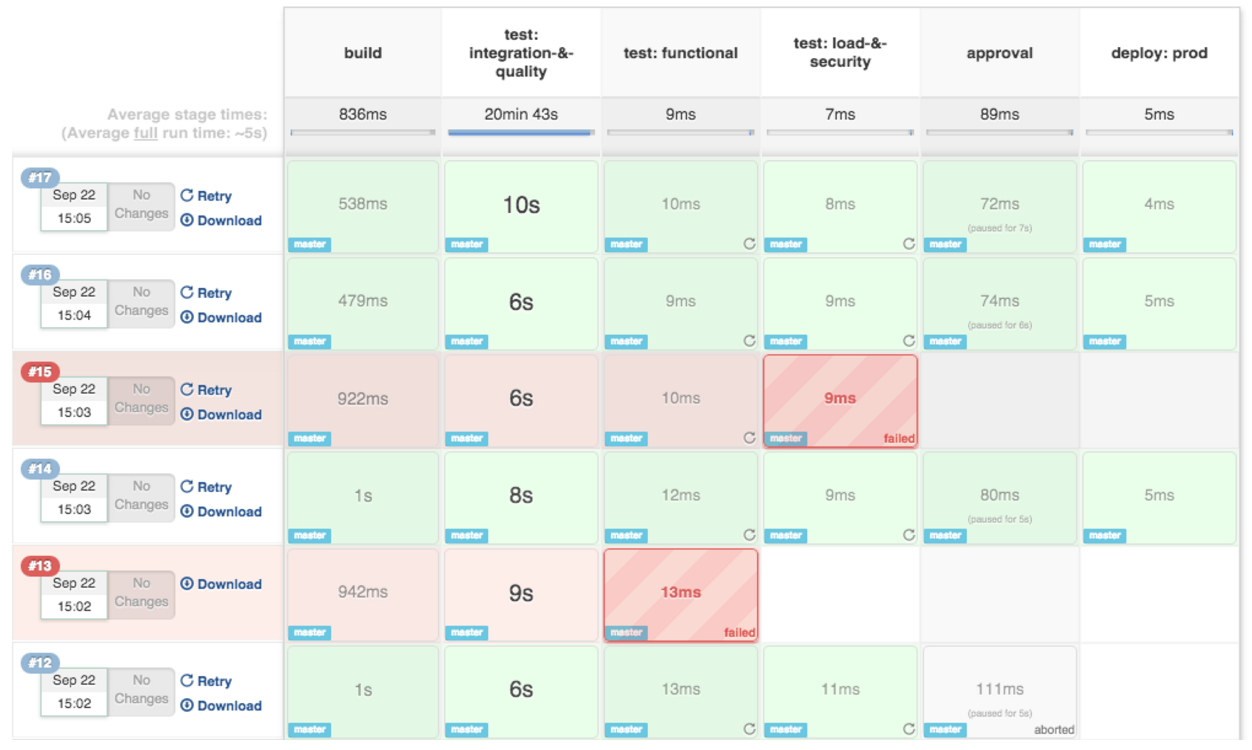
    And better still: the Pipeline Stage View plugin visualizes stages as unique segments of the pipeline:

    Jenkins pipeline example

    4. Do: All material work within a node

    Any material work within a pipeline should occur within a node block.

    • Why? By default, the Jenkinsfile script itself runs on the Jenkins master, using a lightweight executor expected to use very few resources. Any material work, like cloning code from a Git server or compiling a Java application, should leverage Jenkins distributed builds capability and run an agent node.

    Example:

    stage 'build'
    node{
        checkout scm
        sh 'mvn clean install'
    }

    5. Do: Work you can within a parallel step

    Pipeline offers a straight-forward syntax for branching your pipeline into parallel steps. Use it!

    • Why? Branching work in parallel will allow your pipeline to run faster, shifting your pipeline steps to the left, and getting feedback to developers and the rest of your team faster.

    Example:

    parallel 'shifting':{
        //everything
    }, 'left':{
        //I can
    }

    Bonus tip: use the Parallel Test Executor plugin to have Jenkins automatically determine how to run your xUnit compatible tests in optimally parallel buckets! Read more information on Parallel Test Execution on the CloudBees Blog.

    6. Do: Acquire nodes within parallel steps

    Why? One of the main benefits of parallelism in a pipeline is: to do more material work (see Best Practice #4)! You should generally aim to acquire a node within the parallel branches of your pipeline.

    Example:

    parallel 'integration-tests':{
        node('mvn-3.3'){ ... }
    }, 'functional-tests':{
        node('selenium'){ ... }
    }

    7. Don’t: Use input within a node block

    While you can put an input statement within a node block, you definitely shouldn’t.

    • Why? The input element pauses pipeline execution to wait for an approval – either automated or manual. Naturally these approvals could take some time. The node element, on the other hand, acquires and holds a lock on a workspace and heavy weight Jenkins executor – an expensive resource to hold onto while pausing for input.

    So, create your inputs outside your nodes.

    Example:

    stage 'deployment'
    input 'Do you approve deployment?'
    node{
        //deploy the things
    }

    8. Do: Wrap your inputs in a timeout

    Pipeline has an easy mechanism for timing out any given step of your pipeline. As a best practice, you should always plan for timeouts around your inputs.

    • Why? For healthy cleanup of the pipeline, that’s why. Wrapping your inputs in a timeout will allow them to be cleaned-up (i.e., aborted) if approvals don’t occur within a given window.

    Example:

    timeout(time:5, unit:'DAYS') {
        input message:'Approve deployment?', submitter: 'it-ops'
    }

    9. Don’t: Set environment variables with env global variable

    While you can edit some settings in the env global variable, you should use the withEnv syntax instead.

    • Why? because the env variable is global, changing it directly is discouraged as it changes the environment globally, so the withEnv syntax is recommended.

    Example:

    withEnv(["PATH+MAVEN=${tool 'm3'}/bin"]) {
        sh "mvn clean verify"
    }

    10. Do: Prefer stashing files to archiving

    Before the stash capability was added to Pipeline DSL, archives were the best way to share files between nodes or stages in a pipeline. If you just need to share files between stages and nodes of your pipeline, you should use stash/unstash instead of archive.

    • Why? Stash and unstash are designed for sharing files, for example your application’s source code, between stages and nodes. Archives, on the other hand, are designed for longer term file storage (e.g., intermediate binaries from your builds).

    Example:

    stash excludes: 'target/', name: 'source'
    unstash 'source'

    Summary

    Thanks for reading! The new Jenkins Pipeline plugin is gaining more and more traction, especially with the launch of Jenkins 2.0. I’m sure there will be more and more best practices to come as developers across the world develop their DevOps pipelines with Jenkins. We will post follow-up blogs and more examples soon!


    Learn More

    Jenkins is one of the preeminent automation tools. Jenkins is extensible by design, using plugins. Plugins are what give Jenkins its great flexibility for automating a wide range of processes on diverse platforms. Jenkins Pipeline builds on that flexibility and rich plugin ecosystem while enabling Jenkins users to write their Jenkins automation as code. This technical guide will show a number of common use cases for plugins with Jenkins Pipeline.

    These use cases include:

    • Publishing HTML reports
    • Sending notifications
    • Continuous delivery using Docker
    • Test result interpretation and reporting

    Download this technical guide to learn more about and get started with Jenkins Pipeline!


  • HSBC Speeds Software Delivery with CloudBees Core

    HSBC Speeds Software Delivery with CloudBees Core

    HSBC Speeds Software Delivery with CloudBees Core

    HSBC’s Global Head of Digital Platform Operations, Cheryl Razzell discusses how CloudBees Core helps developers to build new products for customers and push to production more frequently.

     I see total evolution of the HSBC environment to encompass CloudBees Core and aligning the roadmaps of CloudBees and HSBC to create a platform that we can use for the future within the bank that not just sits within HSBC digital, but is used by and encompassed by the entire bank. 
    Cheryl Razzell
    Global Head of Digital Platform Operations
    [su_youtube url=”https://www.youtube.com/watch?v=eHgwJAuTIgI”]